The Melted Flush Blush Trend and the New Architecture of Color

-
 By
Emily Hart
By
Emily Hart
- Beauty
- 8 min read
- Beauty
- 8 min read
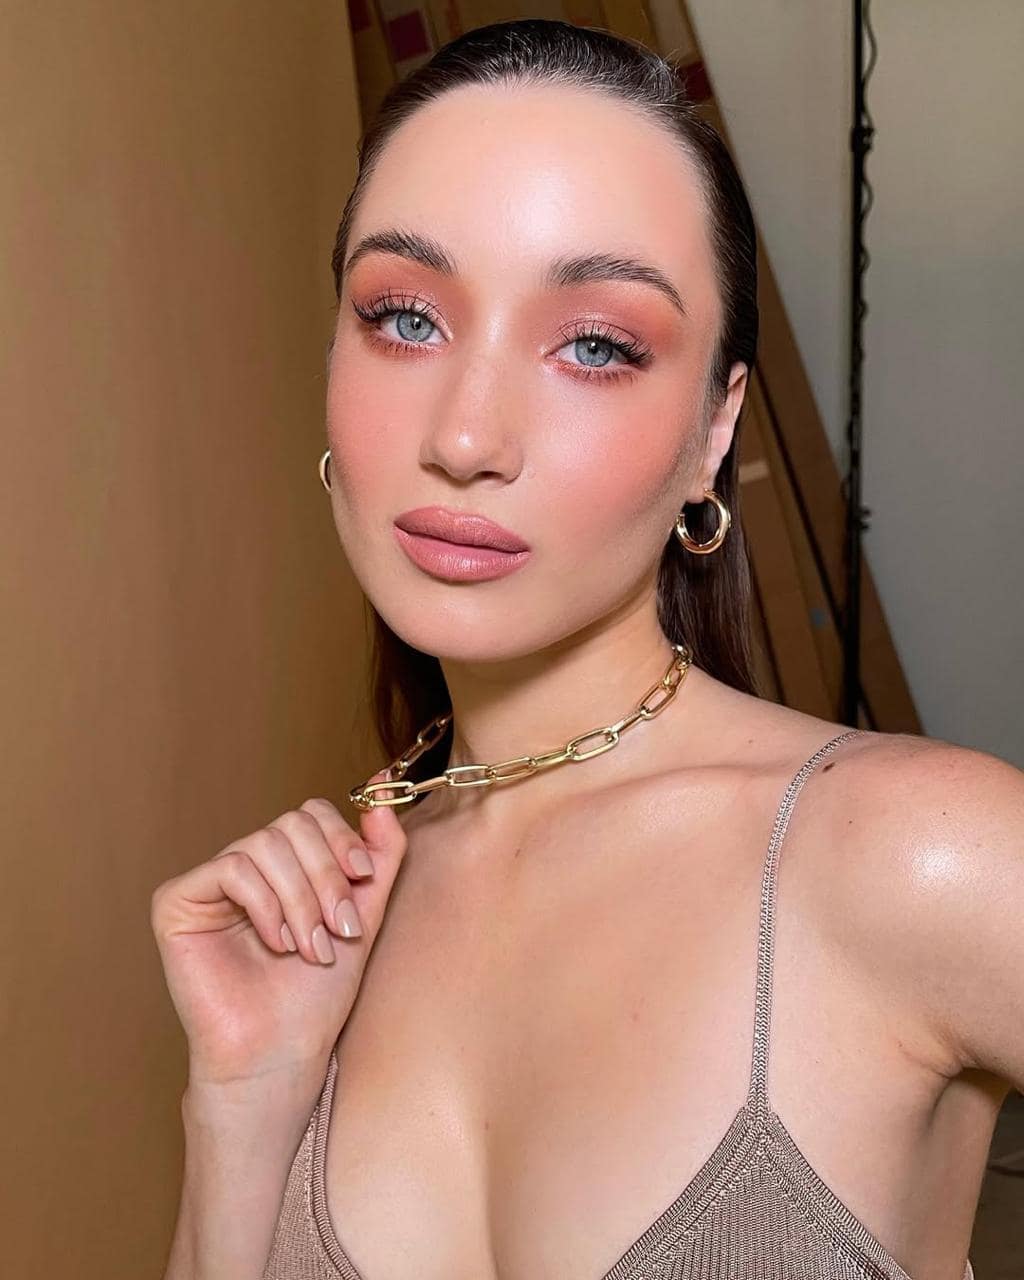
You’ve likely seen that low, honest heat that filters through skin right after cold afternoon air. The viral melted flush blush trend captures exactly that, moving away from the deliberate, sharp cheekbone stripes of the past. It entered the beauty conversation through makeup artist Ngozi Esther Edeme, whose viral “blush blueprint” changed how blush could shape the face.
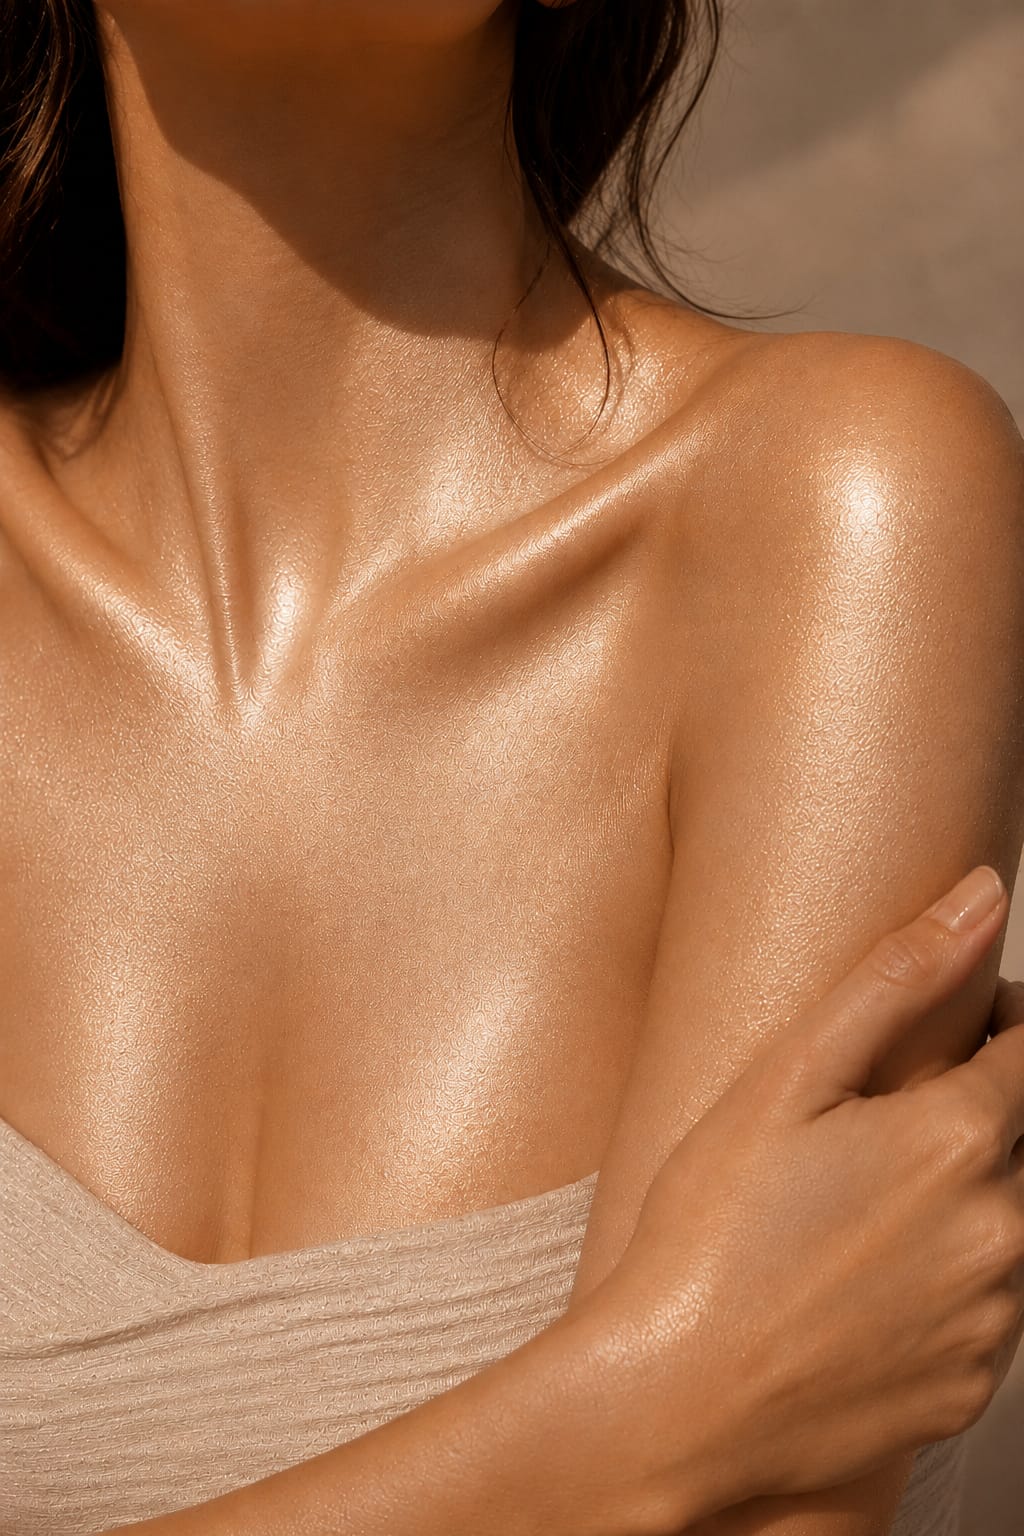
There’s an echo here of the liquid shoulders obsession with making skin appear deeply tactile and free from hard cosmetic edges. Instead of letting pigment sit neatly on top of your base, the look pushes it closer to the skin. The boundaries fade, the color softens, and suddenly the whole thing feels less applied than released.
Who Is Behind the Famous Painted by Esther Method?
Watch the technique for a moment, and you start to see the structure underneath all that softness. Color is placed first, light is built around it, and the face begins to take shape before the blend turns everything gentle.
That’s the idea behind the painted by esther method, which comes from London-based makeup artist Ngozi Esther Edeme, known online as @paintedbyesther. Her viral “blush blueprint” caught on because it changes the usual cadence of complexion makeup. Blush is no longer the sweet final touch after foundation and concealer. It becomes the structure.
In a M·A·Czine interview, Edeme links her love of bold placement to early 2000s beauty icons, including Devon Aoki. “Something HAS to pop on the face,” she said, explaining why blush became the product she kept reaching for. [1]
The painted by esther tutorial works because the pigment is placed early, then framed with brightening concealer before everything is blended together. The formulas melt at the same time, instead of stacking in separate layers. No cakey border, no harsh boundaries. Just color, light, and skin moving as one.
The Blurring Effect: Why This Technique Works Best for Round Face
A finished melted flush doesn’t give the eye a hard edge to follow. The color moves outward in a soft-focus haze, fading into the complexion instead of sitting on one fixed point of the cheek. It fits neatly into the wider mood of blurred beauty we’re seeing everywhere now — softer lines, cloud-like textures, and makeup that looks less drawn on.
There’s history behind that softness too: the mechanics of gradient blush move through Asian beauty, 1970s blush draping, and the sculptural work of artists like Way Bandy and Kevyn Aucoin. You can also see it in the language of transition blush, where the under-eye, cheek, and blush placement are treated as one soft gradient rather than separate zones. Vogue frames the current version through watercolor blush, with makeup artist Carolina Gonzalez describing the finish this way: “You can’t see where the application of watercolor blush starts or ends.” [2]
@rachelocool I might have to try again but what do we think round face queens?? #paintedbyesther #transitionblush #blushtutorial #roundface @M·A·C Cosmetics @Kosas @Charlotte Tilbury @Paintedbyesther ♬ original sound - Rachel OCool
That’s why melted flush blush for round face shapes feels especially useful. On a naturally round face, the effect is less about correction and more about direction. The color sits a touch lower than a classic lifted blush placement, then moves upward softly, giving the cheek a longer line without cutting into the face. You still see roundness, but it feels balanced — warmed, blurred, and gently pulled toward the cheekbone.
Your Step-by-Step Melted Flush Blush Tutorial
Recreating this gradient at home doesn’t require rigid precision. It’s more about understanding how cream and liquid formulas respond to warmth, pressure, and a damp sponge. The best melted flush blush tutorial feels controlled at the start, then softer and softer as the products begin to disappear into each other.
Map the warmth.
Set a small dot of liquid or cream blush near the softest, fullest part of the cheek. Don’t spread it out right away. Let the color stay vivid for a moment, then ease it upward so it starts to suggest lift before you blend. It should look slightly too present at first. That intensity is what gives the gradient something to melt from.
Frame it with light.
Take a creamy, slightly brightening concealer and place a short stroke just under the blush. Add a smaller touch above it, near the outer corner of the eye. This creates the light frame that keeps the flush lifted without turning it into harsh contour.
Melt the center.
Use a damp sponge and bounce it directly over the center of the blush. Press, don’t drag. The goal is to make the blush and concealer meet at the edges, so the pigment starts losing its borders while the warmth stays visible.
Soften the perimeter.
Switch to a fluffy synthetic brush and buff only the outer edge of the gradient. This is where the blend becomes believable. The color should fade into your natural skin tone without leaving a ring.
5. Lock the haze.
Finish with the smallest veil of loose translucent powder. Not enough to flatten the blush. Just enough to take the shine down slightly, while keeping the flush soft, blurred, and still very much part of the skin.
The Vanity Mix: Recreating the Gradient with What You Have
There’s a familiar fatigue that comes with viral beauty movements — the idea that every new finish needs a fresh haul. The melted flush is softer than that. At its core, it’s not about one specific logo on the bottle, but about how the textures already on your vanity behave together: cream color, concealer, powder, warmth, pressure. In her breakdown of the Esther method, Nikki La Rose treats the process less like a shopping list and more like a small experiment, showing how everyday staples can create that missing transition blush — the soft bridge between bright light and richer pigment. Watch the video before you start building a new cart. [4]
The Toolkit: The Viral Products That Actually Melt
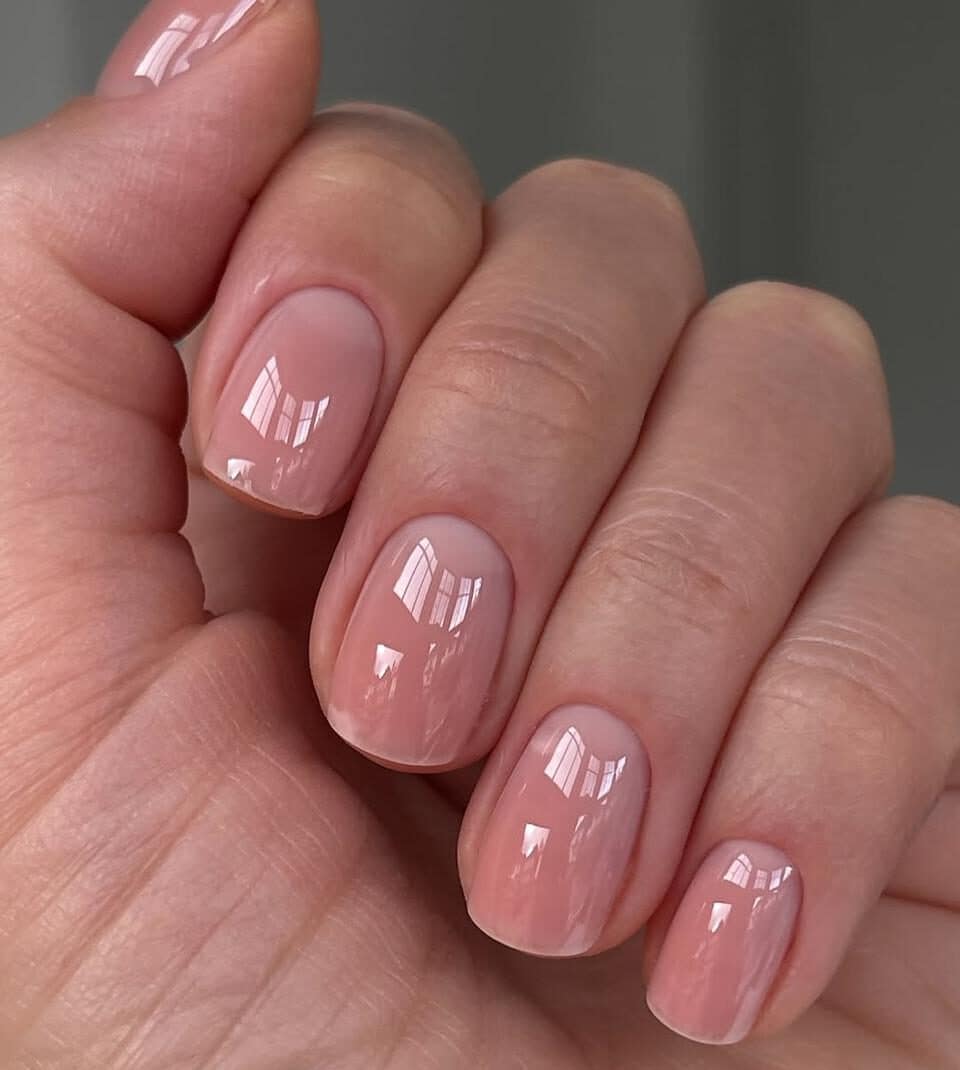
A melted flush depends on formulas that can move before they set. Powder blush isn’t the enemy here. It just doesn’t give you much time. For a melted flush, the formula needs a little slip, a little movement, and enough softness to meet the concealer without turning patchy. The skin needs transparency — the same quiet clarity that made the glass manicure feel so current.
When you’re looking for the best blush for melted flush look, texture matters more than a single hero product. You need a cream that can move, a brighter pigment to give the cheek its center, and powders that blur the edges without drying the whole thing down.
The original color base: Kosas Blush, specifically the Impressionist Multistick.
This is the product tied to the original melted flush movement. Its creamy, skin-first texture is made to dissolve under pressure, fusing into the concealer frame without lifting the base underneath.
The high-pigment alternative: Juvia’s Place Blushed Liquid Blush.
This is the formula creators often reach for when recreating the look in TikTok tutorials. It’s intensely concentrated, so one tiny dot gives the gradient that deeper anchor of color before you start blending. Creators usually choose high-impact tones like Pink Lady or Blush Lily to match the original viral finish.
The triple-blush finish: MAC Skinfinish Blush, including shades from the Colourstruck lineup.
Replicating Edeme’s precise technique is about layering, not just one cream blush and a sponge. A wash of soft lavender, candy pink, or satin rose helps lock the creams while keeping the cheek blurred, bright, and doll-like.
The framing concealer: Kosas Revealer Creamy Brightening Concealer or Hourglass Vanish Airbrush Concealer.
This is the key to the light frame in step two. You need a creamy, medium-to-full coverage concealer with a radiant finish to clean the blush edges without making them look carved. It gives the pigment enough slip to fuse under your sponge instead of drying down too fast.
The setting secret: ONE/SIZE Ultimate Blurring Setting Powder in Ultra Pink.
This is the final blur around the under-eye and upper cheek. The finely milled pink powder softens leftover shine and helps set the gradient into that weightless, airbrushed finish.
Everything here has to interact: pigment, light, melt, blur. Nothing gets to exist in isolation.
The nicest part of the melted flush is that it doesn’t ask you to choose between softness and structure. You still keep both shape and color, but it arrives in a quieter way — through warmth, blur, and skin that looks like it’s doing most of the work itself. Shine is honest here. So is the flush.
Sources:
[1] M·A·Czine, “How Painted By Esther Became The Ultimate Blush Blueprint” (quote from Ngozi Esther Edeme, makeup artist)
[2] Vogue, “How to Master the Watercolor Blush Trend (No MFA Required)” (quote from Carolina Gonzalez, makeup artist)
[3] Allure, “What’s All This Blush Drama Between Patrick Ta and Painted by Esther?” (context on blush draping history and the Painted by Esther conversation)
[4] YouTube, “HOW TO GET “TRANSITION BLUSH” With The Makeup You Already Have” (Makeup By Nikki La Rose, 2026).
Emily Hart
Discover with Vireon Press
Air-Dried Hair: How to Make the Unstyled Wave